Background
Thank you Pinterest for giving me ideas for just about everything! Since John and I started our primal journey just over a year ago we have evolved on many different food and ways of living levels (well, I evolve and John is stuck following my crazy paths). When I first started researching the paleo/primal lifestyle, I joined a closed facebook group called IPMG (International Paleo Movement Group) where people posted about the meals they cooked up, exercises and workouts they did, their weight loss progress, etc. Well, one of the things that I would see posted in the group fairly regularly was on the topic of home made soaps, cleaners, shampoos, and toothpaste, deodorant, etc. These were the posts that I pretty much skimmed right past because seriously, THOSE people are crazy!! I had this image in my head that the only people who really do all that stuff are the Amish. And I live very differently than they do so why would I ever need to go down that path??
 |
| Dad gardening. |
Well, let's fast forward almost an entire year. I have discovered the benefits of eating 'good' food. And what I mean by that is food that is local, seasonal, not processed from a box; animal products that are local, grass fed, pastured chickens (not on a vegetarian diet because chickens are not vegetarians), hormone free, antibiotic free. We limit grains, specifically GMO (genetically modified) grains such as corn and wheat. We use alternative flours like almond flour or coconut flour. We eat more things that are raw like nuts, seeds, honey and maple syrup. Well, this is all fine and dandy but to live this way, you pay a price. The cost of this stuff is for sure more expensive. I buy a gallon of raw milk for $6/gallon. I buy a dozen soy free pastured chicken eggs for $4.50/dozen (and we go through A LOT of eggs). You get the idea. It's a cost I'm willing to pay for mine and my family's health. I pay the price now, and hopefully not in medical costs down the road. Fruits and veggies aren't as expensive as the other items I mentioned, especially when I go to a farmers market. I wish I had a garden like my dad's (see him working away above). He is several states away so I can't take advantage of all of his hard work.
Being Frugal + Pinterest = home made stuff
So how does this all relate to home made laundry detergent? Well, have you seen the price of it?? I started feeling like I was running to Sam's club way too often to buy the largest container of laundry detergent for $20 because when you have up to 7 people in the house at times, you run out of things faster. It started adding up. I like high quality things and it seemed as if I was depleting my disposable income at a quicker pace trying to buy high quality everything. A decision needed to be made. Where can I cut back? What am I willing to give up? As mentioned in the previous paragraph, the food group was NOT an option. So where else is logical? I had put the intention out to the universe that I needed logical ideas as to what areas of my life I could be more frugal about. Here enters Pinterest. Maybe they were always there and I didn't pay any attention to them or maybe they appeared because I had asked for it. In any case, I started coming across pins to boards on home made products. HELLO!! Pin after pin about home made laundry detergent kept popping up on my Pinterest page. So I started reading them. All of them. I probably read 50 different blogs with recipes and they are all pretty much the same basic recipe. I was unsure about the smell (or lack of). I was unsure if it would clean my cloths. I was unsure about a lot of things so I kept reading blogs. Everyday. About homemade laundry detergent. I proposed my idea to John and his first reaction was "OH GOD!" But after I told him what I had read about making it, he totally got what I was trying to accomplish and was supportive of my new path. I was ready. I was going to do this.
Initial prep
So the ingredients are simple. Borax, washing soda (not baking soda, but washing soda - their pH levels are different so I've read), and a bar of soap. Some recipes said any bar of soap but many recipes called specifically for Fels Naptha Soap. Yeah. That's what I said too, "Fels, huh...what?" So last Thursday was the day I was going to jump in. I told John I was going to the grocery store after work to get my supplies. I went to Safeway. Nada. The only thing you could buy at Safeway was mass produced, name brand detergents. Crap. Home Depot was my next logical place to look. Again, nada. (However a local friend of mine did tell me she got Borax at HD but she had to ask someone to help her find it.) Well dang. My son needed detergent ASAP and I was running out of time so I ended up running back to Safeway and bought the smallest bottle of liquid detergent I could find. $8.99 plus tax. Wowzers. Yes, I'm aware there is probably cheaper (AKA store brand) but I bought Tide.
I posted on my facebook that evening if anyone in my area knew where I could find Borax and Washing soda. One of my fb friends replied with, "Uhmmmm....1950?" LOL. So the next day I'm back to surfing the web to find where I could buy all this stuff. I discovered you can make your own washing soda!
How to make your own washing soda. So my plan was, if I couldn't find washing soda I was going to make my own. On my way home from work, I stopped in another town along the way that has a Wal-Mart. Not only did they have the borax, but they had the washing soda AND the fels-whatever soap. I purchased a box each of borax and washing soda and 4 bars of the soap (you only need 1 for each 3-gallon batch but I figured I don't get to wal-mart that often so I may as well stock up while I was there). Aside from the $20 3-gallon beverage dispenser I purchased for the said soap (another brilliant idea I saw on Pinterest) my purchase for detergent was a little over $8 and it will make probably 10 3-gallon batches!!
Soap making
 |
| Suppose to let it sit overnight like this. |
The moment you've all been waiting for. The recipe said to grate the bar soap and put it in a pot on the stove with water and melt it. Easy enough. Threw the soap into my food processor and in about 5 seconds the soap was grated.
I pretty much followed this recipe:
One Good Thing by Jillie. After the soap was melted I poured in the borax and washing soda and cooked it on the stove until it was not quite thick like pudding but maybe like a nice gravy. When it got to that state I poured it into the dispenser and following the recipe I poured additional water into the dispenser until it was half full. The recipe said to let it sit over night until it was a thick glob.
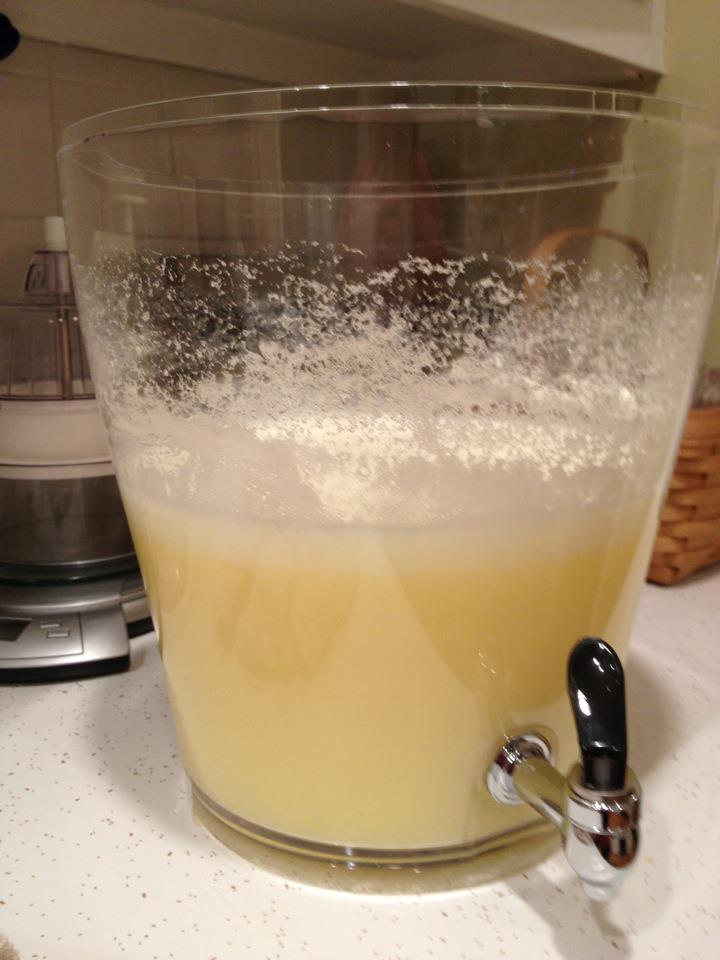
This is what it looked like. It has a very pleasant smell. I actually really like it. I did have to send my son a text message to let him know that it was not lemonade on the counter so don't drink it!
Well, I'm not super patient when it comes to waiting for things overnight so I let it sit in this state for a few hours. It was pretty darn firm so I went to the next step which was to fill it the rest of the way with water and stir. It was a nice liquid detergent consistency. One of the questions I got on facebook was 'does the dispenser get 'gooped up'. At this point I couldn't answer that question. We'll come back to that.
 |
| The finished product - next to the $9 Tide. |
So here's what the finished product looks like! Isn't it pretty? Oh, and pay no attention to the rust on the dryer. We are renters so this is NOT our machine. I could have covered it up I suppose but truthfully, I don't really care what it looks like. It works. So let's back up to just prior to me taking this picture. I had let the soap sit on the counter over night. When I woke up the next morning the soap had separated. Someone on facebook (a seasoned soap maker) actually made that exact comment on my post so I wasn't totally surprised. She said because there aren't preservatives in it, it will do that. So I needed to stir it up. Well, this is THREE GALLONS of soap. A little spoon wasn't doing the job because the soapy part was congealed so it wasn't mixing in with the water. Next up, Joan's hand and arm. I was trying to squeeze each congealed chunk of soap but I wasn't getting it mixed well. Next up, the immersion blender. Bingo!! We have a winner. It mixed up to a beautiful runny soap again! I gracefully carried this container to the basement laundry room, promptly took this picture and was ready for my first load. The soap dispensed beautifully into the cup (after again sticking my hand into the container and putting my pinking into the spout because the congealed soap was stuck in there). Success. The clothes came out clean and without any sort of filmy residue. And they smelled clean and fresh.
Lessons Learned
So a couple days passed and it was Johns turn to do laundry. Nothing dispensed. Fail.
That answered the gooped up dispenser question above. I took the lid off and it's a beautiful soft gel. So, instead of dispensing liquid We scoop from the top what looks a lot like lemon custard. Next batch will be left in powdered form. The woman who commented on my facebook page that said it separates was also the wise one who told me how to make it powdered next time (everything goes in the food processor!)
What's next?
Who knows but I'm sure it will be something!! Hope you enjoyed my experience!